Add New App
This guide describes how to add a new app to the PurchaseStacks dashboard.
App Name
You can specify any app name that you want. We will use this one app name for both platform's apps. A single app in PurchaseStacks supports both iOS and Android platforms.

iOS Configuration
Bundle ID
To get Bundle ID open App Store Connect, go to "My Apps" and choose your app. On the app page find "Your Bundle ID".
App Store Shared Secret
To get shared secret:
- Open App Store Connect, go to my "My Apps" and choose your app
- Select "Manage" under the "In-App Purchases" section from the left side menu
- Select App-Specific Share Secret from the right side above your in-app products. Generate a new one if you don't have it yet.
Android Configuration
Google Play Package
This will be specified in your app's build.gradle
Service account credentials
PurchaseStacks would need a set of service credentials to establish a connection with Google servers to accurately track in-app purchases. The process is a bit complicated but it improves security by only providing PurchaseStacks with the access we need.
caution
Only the account owner can configure service credentials for API access
1. Link to a Google Developer Project
- Go to Google Developer Console and log in using your Google Developer Account credentials
- Click the Settings icon in the left menu bar

- Select API Access
- Select Link to connect your Play account to a Google Play Android Developer Project. If you don't see the button, go directly to the next step
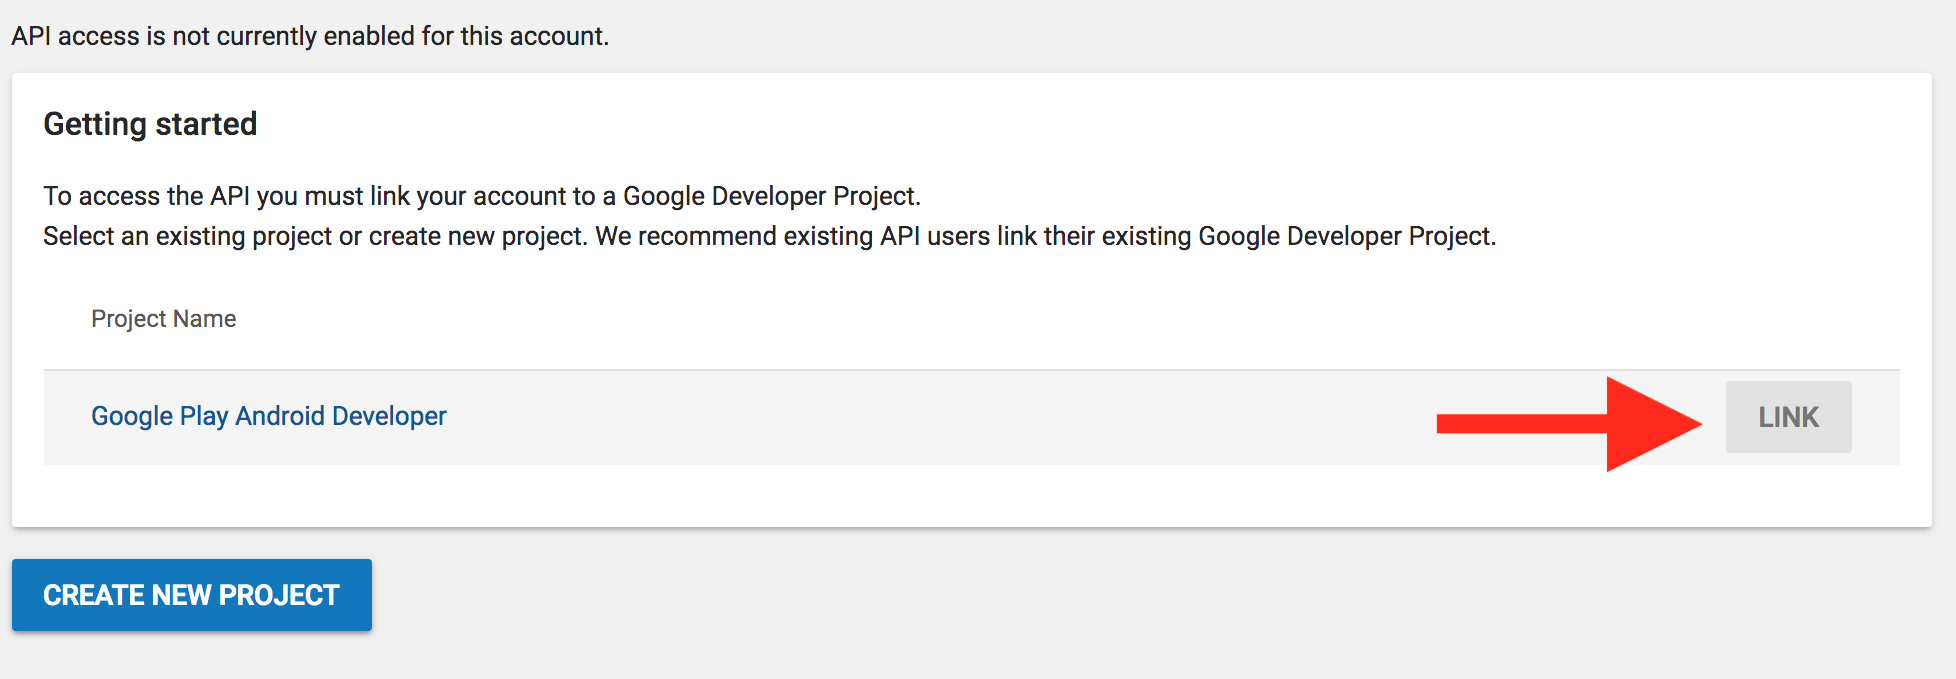
- Press the Create New Project button

caution
Only do the step mentioned above, if you do not see Link button
2. Create a Service account
- Scroll to the bottom of the page and click Create Service Account
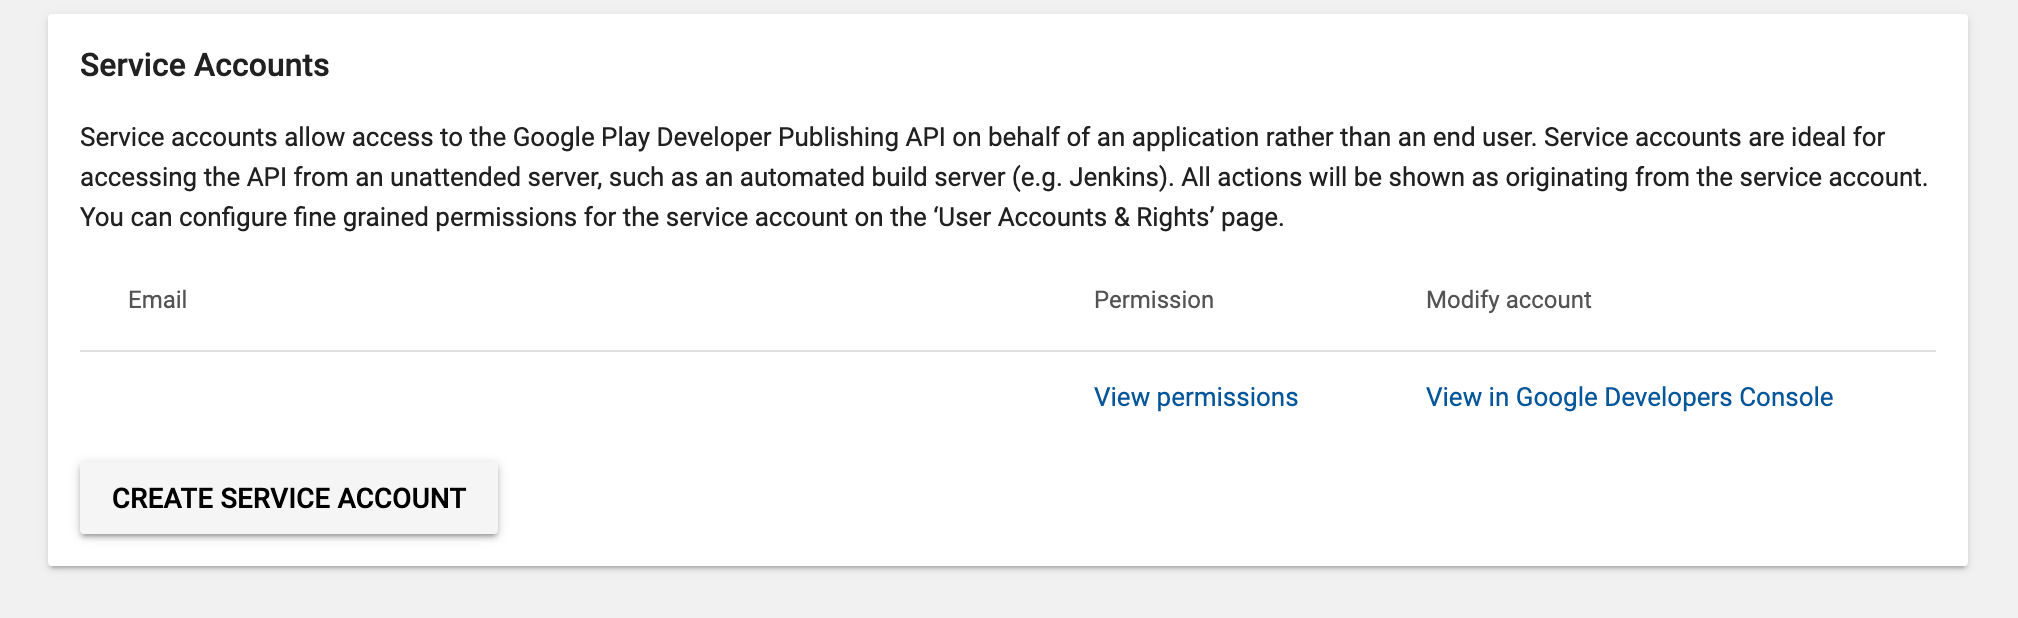
- Follow the link to the Google API Console

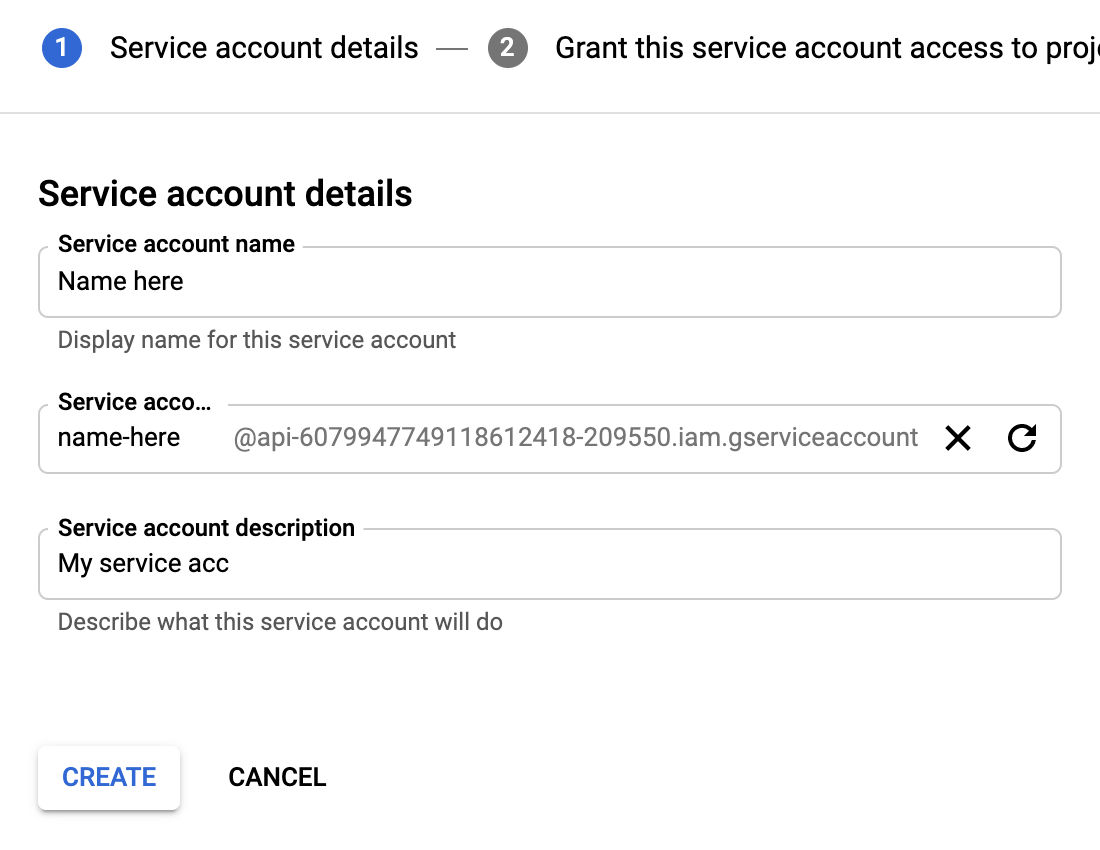
- Сlick the + CREATE SERVICE ACCOUNT button at the top of the page

- Set the Service account name
- In the Role dropdown choose Owner and click the Continue button
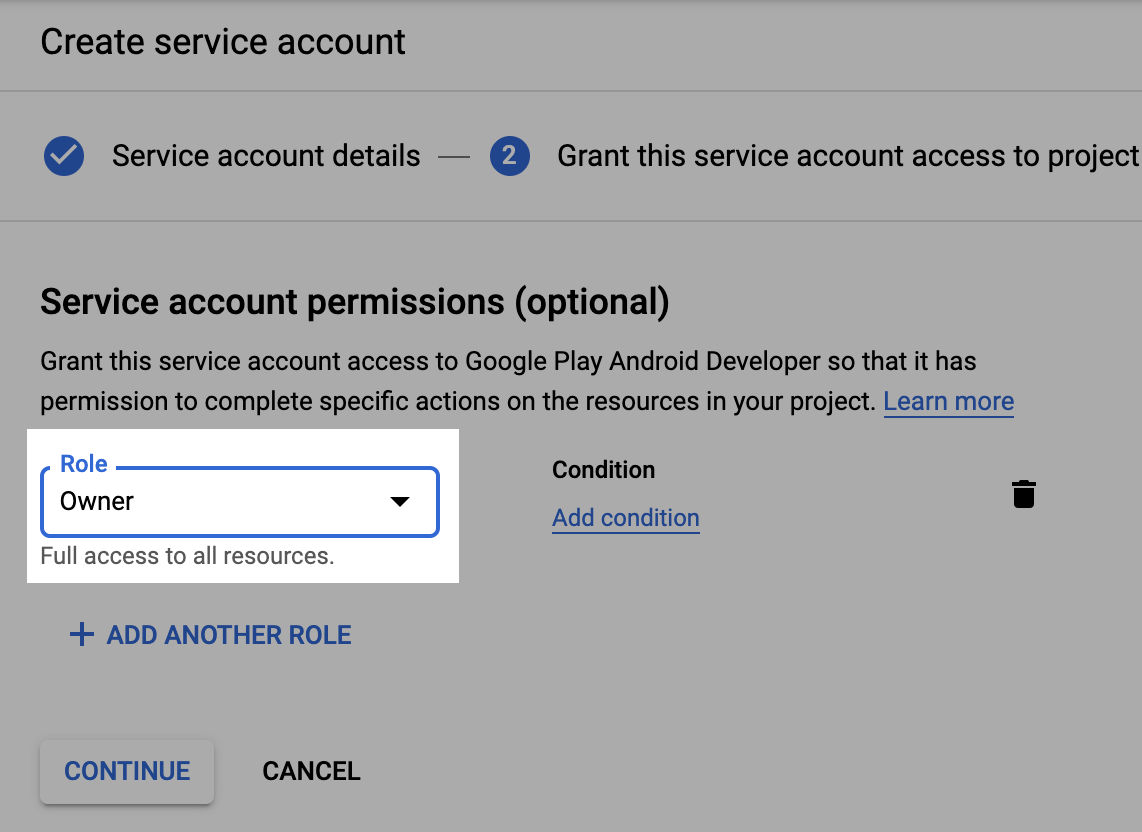
- Click the Create Key button

- Download the JSON file clicking the Create button. When you hit create, a JSON file will be downloaded. These are the credentials that PurchaseStacks will need to communicate with Google

info
Save the JSON file somewhere, this will be needed in the later section
3. Grant Financial Access to PurchaseStacks
- Go back to your Google Console Account and click Grant Access on the newly created PurchaseStacks service account

- Set the Role to Finance and Add Manage Orders Permissions

- Copy and paste the credentials JSON that was downloaded in step 2 to your PurchaseStacks account and we'll be ready to handle Google Play purchases!

note
It can take up to 36 hours for your Play Service Credentials to work properly with the Android Developer API. You may see "Invalid Play Store credentials" errors and be unable to make purchases with PurchaseStacks until this happens.